Showing posts with label Natural. Show all posts

Wednesday, March 01, 2017

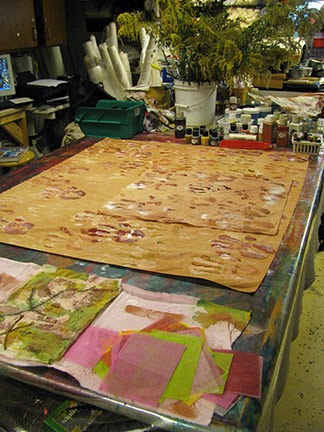
Basic Blues: Five Indigo Vats, Five Different Ways!

Starts March 20th

Basic Blues: Five Indigo Vats, Five Different Ways is a comprehensive Five Week online course which is a one-stop resource for anyone wishing to learn the art of dyeing fabric, fibers, and yarn, with indigo.

During the Five Week course you develop a solid foundation to start, maintain, trouble shoot, and revive FIVE different types of Indigo vats.

I will teach you the skills necessary to use Indigo safely, and how to create different values of blue from palest blue to the deepest of blues. You will learn the secrets to creating beautiful blue fabrics, that are not only light fast, but the indigo won’t crock off of your fabric, fibers, and yarns.

During this Five Week course I will also teach you about the history of indigo, its origins as a dye, the different types of indigo plants, the chemistry behind the elusive dye, and its applications other than as a dye.

You will work with Rust and Tannin Patterning Techniques as a Final BONUS LESSON.

As part of my private Facebook community, you’ll discover a global community of students, and friends, to support and to inspire you.

My passion is for you to experience the joy of working with indigo, and to learn which type of indigo vat works best for you!

Downloadable videos, which means you will have lifetime access.
Downloadable handouts, so that you can print out the information to use in your studio.
Access to my Facebook Community.

Tuesday, May 24, 2016

Creating an Indigo Vat

Creating and Indigo Vat!!!

NOTE: this is from my other blog written in 2009

Dye Materials Needed

1 ounce Indigo extract or Indigo chunks
1 cup Soda Ash or Lye (I HIGLY recommend using Soda Ash NOT Lye~!)
2 Tablespoons Thiourea dioxide or Thiox
Water


Equipment needed:

Respirator – you only get one set of lungs! Wear a respirator when handling dye powders, mordants, and dye assists~!
Gloves – wear heavy duty kitchen or dyeing gloves when handling the indigo ingredients (See safety Instructions Below)
Stock Pot 18 quarts or bigger, can be Stainless Steel or Enamel the indigo vat will react with aluminum so I don’t recommend using aluminum pots for creating the vat.
Scale for weighing dyes and chemicals – again studio dedicated!
Measuring spoons, measuring cups, wisk for stirring
Jar – wide mouth pint jar for making indigo paste
Spoon, studio dedicated, for stirring the vat
Tongs for retrieving your fabrics, fibers, etc.
Lingerie bag for small items you wish to find in the vat again the bag makes them easier to retrieve
Water for your vat, rinsing, and for oxidizing
Vinegar – helps to restore the pH balance of wool and silk fibers/fabrics
pH papers/strips for testing the pH of your vat.
Heat source
Clothesline for hanging fabrics onto to help fabric oxidize faster.


Natural Indigo Chemical Reduction Mini-Vat Instructions:

1. READ Safety Instructions before Beginning the Indigo Vat! 

2. Fill your vat container with water you don’t need to heat the vat at this point. ALLOW TO SIT OVERNIGHT, doing this allows the oxygen to dissipate from the vat.

3. Place 1 ounce Natural Indigo powder (if you are working with hard chunk indigo it will have to be ground down first) into a suitable container.

4. Add just enough hot water until you get a paste – preferably lump free (I use a dedicated wide mouth pint jar for this solution.

5. Add soda ash or lye to the vat water - NEVER add water to your soda ash or lye ALWAYS add the soda ash or lye to the water!!!

6. Slowly add the indigo paste to the vat solution

7. Stir to dissolve NOTE this may take quite a bit of stirring, heating the vat at this point also helps with dissolving the paste faster.

8. Next add thiox to the vat solution stir very little so as to avoid adding Oxygen to the vat.

9. DO NOT BOIL YOUR VAT as this will cause bubble formation and will introduce Oxygen into the vat.

10. REMOVE HEAT after 30 minutes

11. Cover vat and allow to sit until reduction is complete.

12. Reduction is complete when your vat turns a yellow to yellowish pea green color.

13. If your vat is still blue after 24 hours then you have too much Oxygen in your vat add thiox to the vat in small increments, a few grains of thiox at a time, to further reduce the vat.

14. If you reduce the vat too far then gently stir the vat with one or two swirls of the spoon and allow to sit for 30 minutes.

15. You will need to test the pH of the vat to see if the pH is correct

16. pH should be 10.0 – 11.5
· cottons 11.0-11.5
· wool and silk 10.5-11.0 preferably closer to 10.5

17. Adjust pH by adding small amounts, half teaspoon at a time, of soda ash to your vat, even is you created a lye vat do NOT add more lye to the vat at this point.


A link for Indigo Vat Safety Instructions 

Wednesday, July 09, 2014

Experimenting


Stenciling on natural dyed (tea and coffee) fabric using my Black Birds in Tree stencil from StencilGirl Products!!!


I'm using purple and yellow acrylic paints and a stencil brush.


This while waiting for the screen printing supplies to arrive.  The bulb in my thermofax machine died and is no longer available, so on the advice of some trusted artist friends I've purchased Jacquards drawing fluid and filler to make silk screen designs.  The upside to this is I'll have large screens for screen printing natural dyes onto the cloth.

Thursday, June 12, 2014

Why I don't Eco-Dye My Fabric

Why I don’t Eco-Dye Fabric
I do, however, dye, paint, and print, my fabric with natural dyes.

Photo courtesy of the Main Street Cultural District Ames, Iowa.

I participated in a local art walk last Friday and after three hours of questions about my natural dyed scarves, artwork, etc., I am once again reminded as to why I don’t call myself an eco-dyer, for the most part nobody is interested in the craft of eco-dyeing! 
While most people play lip service to protecting the environment, sustainability, fair trade practices, and all things “green” the fact of the matter is when most people found out that I was using tree bark, mushrooms, leaves, bugs, and other stuff to dye my art cloth the response was an overwhelming “that’s nice” or “that’s really cool”.  "That’s nice" is the kiss of death, it's the Mid westerners version of “so what” or “who cares”!

The whole experience solidified in my mind what I already knew, while there are some that are truly concerned about the environment and sustainability, the majority only cares if it saves them a buck or two.  Which leads me back to why I don’t eco-dye my fabric, fibers, and threads, but in fact dye them with Natural Dyes, to me it’s about the process and the relationships I form with other dyer’s, and most importantly with nature that surrounds and inspires me. 

Natural dyed silk scarves.

For me the process is not about immediate gratification, but about discovery, learning, exploring, and most importantly relationships.  Unless a local woodworker gifts me a bag of wood chips from their dust collection system or from their lathe turnings, the wood, barks, and roots I use to create my designs are collected over a period of years, often time’s decades. 

My finished artwork was a hit with everyone with plenty of people telling me they’d love to be able to stitch and sew like I do and do I teach classes?  The evening wasn't a total bust, I got plenty of hits from women of all ages that are interested attending a stitching party; the older women of course were very excited about the wine aspect of said parties. 

Click here to learn more about eClasses, Workshops, and my newest offering Out of the Box Art Parties!

Monday, April 07, 2014

Deconstructed Screen Printing with Madder Lac Extract


Madder lac screen printed onto compost dyed cotton fabric.


Madder lac screen printed onto indigo mono printed cotton fabrics that was dyed with tannin, learn more in my eBook Mark Making with Nature!

Sunday, March 23, 2014

Natural Dyed Hexagons


Natural, compost (bundle), and rust dyed cotton fabrics.  The dark red was obtained using a Turkey Red recipe.


I started these hexagons using my natural and compost dyed fabrics in March of 2005, the weekend my mother died actually, and found them last night while I was looking for a missing stack of colored papers.  This couldn't of happened at a better time as I am currently working on a new body of work called "Faded Memories: Stitched Stories of the Prairie and Plains" for an upcoming solo show at the Sanford Museum in Cherokee, Iowa.

This new body of work will encompass both traditional and digital techniques, and to say that I found these hexies made up already would be an understatement! The hexagons are from a pattern known as Grandmother's Garden, which seems rather appropriate for this new body of work!

Wednesday, January 29, 2014

Introductory Sale Mark Making with Nature Ends January 31st!!!


Introductory Price 
(Ends January 31st)

Mark Making with Nature Video Series
Own $39.95 or Rent $19.95 

Click here to learn more!!!

Tired of your fabric looking like everyone else's?  In this video series I will teach you how to push the limits using natural dyes and traditional surface design techniques!

Saturday, December 28, 2013

January 2014


There WILL be some of this happening in my wet studio next week!  Natural dye extracts painted onto silk fabrics.

Friday, December 27, 2013

Academy Membership Special Pricing Ends Soon!!!

The Natural Surface Academy
Membership Special
 
Natural dye painted cotton fabric. 
Cochineal, osage orange, and charcoal.


Offer Ends January 1st, 2014!!!
Learn more here
 
Madder root, cochineal, and logwood
on silk charmuse and silk crepe de chine fabrics.
 
Deconstructed screen printing with newsprint and ink on cotton.


Friday, November 29, 2013

The Natural Surface Academy Black Friday Special!!!


Tired of your Natural Dyed Fabrics looking like everyone else's??? 

Then join me at the Natural Surface Academy in 2014 where we will push the rubicon in Surface Design with Natural Dyes, Rust, Fabric Paints, PaintStiks, Gutta, Shibori, Ink, and More, to create work that is unique to you!!!

The Natural Surface Academy

Wanted to join the Academy to learn about producing all of this yummy fabric, but was afraid to do so because of the price?  Today's your chance to join us in 2014 at HUGE discount!  49% off the regular price to be exact! ($599.00)


As part of your membership you will have access to my DVD's, videos, eBooks, online classes (self-paced)  and workshops (scheduled), and most importantly to ME!!!  I will help you take your Natural Dyed Fabrics to the next level be it surface design techniques or stitching, I can help you obtain your goals.
HandsCompost, Rust, and Natural Dyed Silk Organza Net.

Learn More Here!!!

Corn Head Girl
Natural Dyed Cotton and Silk Fabrics.  Machine Stitched.


Thursday, November 21, 2013

Marigolds and More!!!


 My first ever newsletter went out this afternoon!  I will be sending one out once a week from here on out, now that I've spent some time learning how to use MailChimp.

Here are a few of the things discussed in my newsletter in case you missed it!

 
I am inviting you to join me at the Natural Surface Academy in 2014 to participate not only in the Marigold Project BUT to also unleash that creative prowess you know is lurking deep inside of you!
 
  • 2014 will start off with a Splash as we work on our 30-Day Cold Dyeing Project, I will be using both marigolds AND madder root with Wool, Silk, and Cotton Fibers.
  •  
  • We will go to extremes with our natural dyed fabrics, fibers, yarns, and more in my Extreme Embroidery class! 
  •  
  • Get down and get gellied when we print fabric and paper with natural dyes using a Gelatine Plate for printing!
  •  
  • And this is only the beginning! 

Saturday, November 09, 2013

30 Day Challenge Samples


Samples from 1998 from previous 30 Day Cold water trials.  These will be  used for the 30 Day Challenge I'm holding at the Natural Surface Academy this winter.  I will put my notes into an eBook for Academy members, along with scans of the samples.

Thursday, October 31, 2013

Gelatine Plate Printing with Natural Dyes


This is from several years ago, I have a geliplate my best friend Brenda got me for xmas last year that I really, really need to use! I'm thinking some earth pigments and my Black Birds in Tree stencil onto fabric for starters.  The plate in the above photo I made myself, here I'm using lace and trims as resists for the print which I made onto fabric.


Cotton fabric, that I do believe I compost dyed, osage orange on the gelatin plate with some lace trims gave a nice resist pattern.  After curing and washing the osage orange color is about 30% of it's orignal brightness on cotton fabric.  Now to find this piece of fabric in my stash and audition some threads for stitching.

Sunday, October 13, 2013

MMWN DVD Coming Soon!!!

 
Am pleased to announce that my DVD
Mark Making with Nature
will available as a digital download and soon!

Sunday, September 22, 2013

Studio Rag


The colors are a deep camel and pale yellow, the yellow doesn't show up well in this image due to the poor lighting in my office.  Natural dyes on cotton.

Wednesday, August 28, 2013

Common Phlox


Common Phlox Phlox divaricata

Not worth my time collecting to use in a dye pot, any color it would yeild would fade in a matter of days, if not hours.  The stems would yeild a weak yellow at best.  But given the current extreme heat Iowa is experiencing it is one of the few plants that has survived in my garden without needing watering.

Wednesday, August 21, 2013

Compost Dyeing and Other Fermentation Dyeing Techniques eBook


If you purchased a copy of my eBook "Compost Dyeing and Other Fermentation Dyeing Techniques" last year through Kindle and it is corrupted please let me know and I will send you a replacement copy!

This eBook is Currently ON SALE
for $3.99